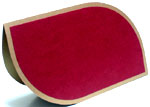
An Elegant 50th Birthday Greeting Card You Can Make
Use gold color, the 50 year symbol, plus other tips and tricks to make this 50th birthday card
Is someone you know turning fifty? Then create an elegant 50th birthday greeting card such as this for him or her.
Fifty years is quite a big deal. And you can make a simple birthday card that shows this by using the gold color. Because this color is the symbol for this milestone.
Tools and Materials
8.5” x 10” gold cardstock paper
5.5” x 6” gold cardstock paper
4.5” x 8” maroon cardstock paper
4.5” x 5” maroon cardstock paper
Gold ink pad
Black ink pad
Rubber stamps
Mounting blocks for rubber stamps
Drawing pencil
Eraser
Scissors
Sliding paper trimmer
Metal ruler
Scoring stick
Circle template
Circle cutter
Cutting mat
Craft cutting knife
Glue
Step by Step Instructions
Cut the 4.5” x 5” maroon cardstock paper into three 1.5” x 5” strips.
Use a 2” diameter circle to create curved corners at the top right and bottom left of the strips.
Repeat this for the remaining two strips
Use rubber stamps and the gold ink pad to stamp “Happy 50th Birthday” on the first strip
Use rubber stamps and black ink pad to stamp “Congratulations” on the top half of the second strip and bottom half of the third strip
Cut the 5.5” x 6” gold cardstock paper into three 2” x 5.5” strips.
Use a 2.5” diameter circle to create curved corners at the top right and bottom left of these strips of cardstock.
Glue each maroon strip to each gold strip with 0.25” margin all around.
Score the 8.5” x 10 gold cardstock paper in the middle and fold it into a 5” x 8.5” card.
Then use a 7.5” diameter circle to create curved corners at the top right and bottom left of the card.
On the 4.5” x 8” maroon cardstock paper, use a 7” diameter circle to create curved corners at the top right and bottom left of the paper.
Then glue this maroon cardstock on the folded 5” x 8.5” card with 0.25” margin all around.
Arrange both black-stamped and glued strips on top of the card. The top-lettered-strip stays at the top left corner of the card and vice-versa.
Glue the strips in place with 0.5” margins from their respective corner-edges of the folded gold card.
Next, arrange the last gold-stamped strip right in the middle of the whole card. Hence, this creates a 1.5” margin from the straight edge of the strip to the respective straight edge of the folded card.
Glue this last strip in place.
To finish the 50th birthday greeting card, use black ink and rubber stamps to embellish the visible top right and bottom left backgrounds of the 4.5” x 8” maroon cardstock part.

Cool Tip

Save time by taping the strips together and cutting all of them at once.
Additionally, before cutting, mark the radius of the cut with a pencil in order to align it on the cutting mat.
Remember to erase any pencil marks afterwards.


Other Tips and Tricks

If you have a rubber stamp that reads “Happy Birthday” all together. Simply use your ink pad on only one word at a time. This way, you can add “50th” between those two words.
In making the 50th birthday card, you can try out other black-stamped statements on the strips.
For instance, if the card is for a loved one, you can acknowledge this by replacing the “Congratulation” statement with stamped heart shaped symbols.
Recent Articles
-
Get Free Greeting Card Templates plus Ideas on How to Make Yours
Download Various Types of Greeting Card Templates and Get Options for Adapting Them. Includes Precautions and Proactive Steps to Help Prevent Messing Up Yours. -
Did You Notice the Revamped Homepage?
Indeed, it’s been a longtime coming, but the homepage makeover is finally here. For comparison, feel free to see the way it used to look as captured through the inescapable Wayback Machine Internet Ar… -
Free Card Greetings for Saying Hello and Goodbye in Your Greeting Card
Get ideas to personalize your greeting card salutations and valedictions because cool card greetings make great first impressions about your greeting card messages.


New! Comments
Have your say about what you just read! Leave us a comment in the box below.