Making a Unique Love Card that Expresses "I Love You" with No Words... Just Petals
The key: a meaningful love greeting card art. Plus, get funny greeting card messages for inside. Ironically, the heart shaped petals are not actually meant for a card
Making a love card with heart shaped petals as the greeting card art might seem conventional.
However, consider this: where do you find or buy heart shaped petals?
Not in the craft sections or Valentine sections of stores.
But, usually, in the wedding sections and wedding stores.
Therefore, the real question is, what do you do with the remaining petals after the wedding?
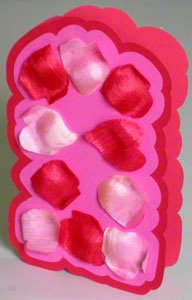
I recently came across the petal leftovers used in my wedding. And, yes you guessed it, I got inspired to create a love card with the petals as the greeting card art.
The debate over words. The result: funny love card messages
Another cool concept about this card is:
Usually, cards have words on the cover. But this one has none. Yet, it's application is self-evident.
This transforms it from a cool creative card into a cool unique card.
Additionally, this unique feature makes it easy to come up with funny greeting card messages to put inside.
For example:
Hope the petals
make it obvious...
...I love you
If you like old school, then go retro with tokens:
Please take these petals
as a token of
my undying love for you
Now, back to modern times, for wedding anniversary:
Please remember to replace the number (in this case, 2) with the correct ratio that suits your case.
Here are 2 love petals
for each year
we've been together.
Thanks for loving me.
Happy Wedding Anniversary!
Bottom line, even with no words on the cover, this unique love greeting card is great as an anniversary card, Valentine Day greeting card, Mother’s Day card, “just because” card, or something else.
Hence, How will you use yours?
More interestingly, how many petals will you use in making yours?
So, how many petals does it really take to express affection on a love card without words on the cover?
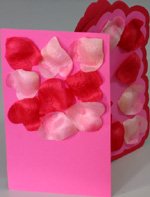
This might seem trivial. But ponder over this:
My first card making attempt didn't turn out as anticipated.
It was missing something - elegance.
Specifically, the petals were cramped in, as if starving for attention and love.
There was no way these petals were going to convey affection if each one seemed deprived of it.
Fortunately, after stopping halfway, there were still enough petals left to start over.
Tools and Materials
8.5” x 11” cardinal red cardstock paper
5” x 8” lollipop pink cardstock paper
Red and light pink heart shaped petals, the wavy kind
Drawing pencil
Eraser
Scissors
Sliding paper trimmer
Metal ruler
Scoring stick
Cutting mat
Craft cutting knife
Glue
Card Making Instructions
Organize the flower petals on the 5” x 8” lollipop pink cardstock leaving about 0.25” space from cardstock edge to petal edge.
Glue the petals in place on the cardstock.
Draw the silhouette of the petals on the lollipop pink cardstock giving about 0.25” margin.
Use scissors to cut out the silhouette on the lollipop pink cardstock.
Score and fold the 8.5” x 11”cardinal red cardstock paper into a 5.5” x 8.5” card.
Glue the finished lollipop pink cardstock in the center of the folded scarlet red card leaving a 0.25” margin.
Draw the silhouette of the lollipop pink cardstock on the cardinal red cardstock giving about 0.25” margin.
Use scissors to cut out the silhouette on the cardinal red card.
Finally, erase all pencil marks.
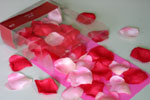
Cool Tip

With wavy petals, the goal is for the petals to retain their shapes at the end of the exercise.
So it's key to glue down the petals just where they come in contact with the paper. And only a few spots actually touch the picture.
The picture here shows three spots per petal to glue the pieces. The spot locations depend on the side touching the paper. For clarity, the spots are marked in black.


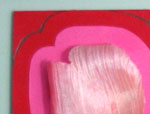
Another Important Tip
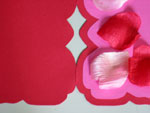
While cutting the unique romantic greeting card, remember to leave enough space for the seam so that the card can still open up.
Recent Articles
-
Get Free Greeting Card Templates plus Ideas on How to Make Yours
Download Various Types of Greeting Card Templates and Get Options for Adapting Them. Includes Precautions and Proactive Steps to Help Prevent Messing Up Yours. -
Did You Notice the Revamped Homepage?
Indeed, it’s been a longtime coming, but the homepage makeover is finally here. For comparison, feel free to see the way it used to look as captured through the inescapable Wayback Machine Internet Ar… -
Free Card Greetings for Saying Hello and Goodbye in Your Greeting Card
Get ideas to personalize your greeting card salutations and valedictions because cool card greetings make great first impressions about your greeting card messages.


New! Comments
Have your say about what you just read! Leave us a comment in the box below.