Make an "I Miss You" Card That’s Simple and Unique
Use a unique card feature to create the card. Plus get funny card sayings, card making instructions, and an alternate design.
There are may ways to express "I miss you." But sending out a missing you card is still one of the best ways.
Additionally, this particular card is special because it’s unique and humorous.
The card hinges at the corner instead of the edge. And, this little feature relates to one of the many
simple ways of creating unique cards.
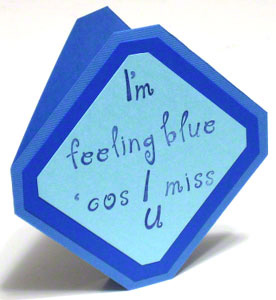
This blue card is also a funny card. Because it expresses that the person sending the card feels blue too.
Since there’s already one funny statement in front of the card, put another funny one inside the card.
Not sure what to put down? Don’t worry. There are a few ideas below.
Add a funny phrase inside the miss you card too
One cool idea is to complement the funny phrase in front with another amusing expression inside the card.
Just like the front, the idea here is to use the blue nature of the card in the message. Here are a few examples:
First example.
...And it’s so bad that I can’t
even stand the color blue anymore.
Still missing you
Second one.
Because you are not here,
there’s no more color in my life...
...except blue.
I really miss you
Third idea.
I’m already feeling blue
so please come and stop me
before I start singing the blues.
‘Wish you were here
Next, let’s create the card.
Tools and Materials
- 3.75" x 3.75" pastel blue cardstock paper - lightest blue
- 4.5" x 4.5" Blue Mediterranean cardstock paper - darkest blue
- 6" x 12" slate blue cardstock paper - middle shade blue
- Blue ink pad
- Rubber stamps
- Mounting blocks for rubber stamps
- Drawing pencil
- Eraser
- Scissors
- Sliding paper trimmer
- Metal ruler
- Scoring stick
- Cutting mat
- Craft cutting knife
- Glue
Step by Step Instructions
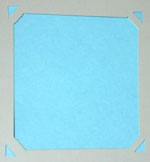
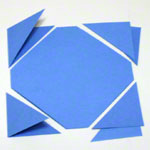
On the 3.75" x 3.75" pastel blue cardstock paper, use pencil to mark off 5/16" from the left and right of all corners.
Cut off these tiny 45° pieces from all the corners.
Erase any pencil marks.
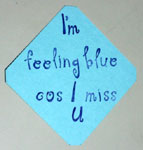
Turn this piece of cardstock 45° so that the edge becomes the highest point, use the rubber stamps and blue ink pad to print "I'm" on the topmost corner.
Next, rubber stamp "feeling blue" on the next line.
Then, print " 'cos I miss" on the third line.
Finally, rubber stamp "U" on the bottom corner.
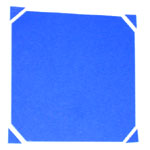
On the 4.5" x 4.5" Blue Mediterranean cardstock paper, use pencil to mark off 9/16" from the left and right of all corners.
Cut off these tiny 45° pieces from all the corners.
Erase any pencil marks.
Glue the pastel blue cardstock to the 4.5" x 4.5" Blue Mediterranean cardstock, making sure the edges have even margins.
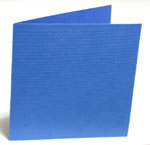
Score the 6" x 12" slate blue cardstock paper right in the middle and fold into a 6" x 6" card.
On this folded piece, use a pencil to mark off points that divide each edge into three parts with 1" in the middle and 2.5" on the left and right. These points represent the 45° edges for the finished card.
Cut off these 45° edges from all the corners. This transforms the 6" x 6" square into a 5" x 5" square.
Erase any pencil marks.
Finally, glue the completed 4.5" x 4.5" Blue Mediterranean cardstock on top of the slate blue cardstock. And make sure the edges have even margins.
Cool Alternative Design
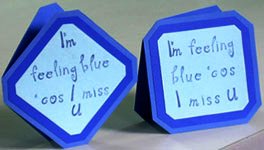
Ever wondered what this card would look like if the words read from left to right instead of from top to bottom?
Well, I was wondering the same thing. So I made another card afterward. ...Just to satisfy my curiosity.
By the way, which of these two designs do you prefer - top to bottom or left to right? Add your opinion to the poll below
In essence, with either style you pick, it’s still a cool, unique, and funny card.
Recent Articles
-
Get Free Greeting Card Templates plus Ideas on How to Make Yours
Download Various Types of Greeting Card Templates and Get Options for Adapting Them. Includes Precautions and Proactive Steps to Help Prevent Messing Up Yours. -
Did You Notice the Revamped Homepage?
Indeed, it’s been a longtime coming, but the homepage makeover is finally here. For comparison, feel free to see the way it used to look as captured through the inescapable Wayback Machine Internet Ar… -
Free Card Greetings for Saying Hello and Goodbye in Your Greeting Card
Get ideas to personalize your greeting card salutations and valedictions because cool card greetings make great first impressions about your greeting card messages.


New! Comments
Have your say about what you just read! Leave us a comment in the box below.