Make a Funny New Baby Greeting Card That Looks Like a Postage Stamp
Get instructions and add humor by phrasing the new baby delivery like a postage stamp delivery
A new birth is cause for celebration. So add some humor to your new baby greeting card. And create a funny greeting card.
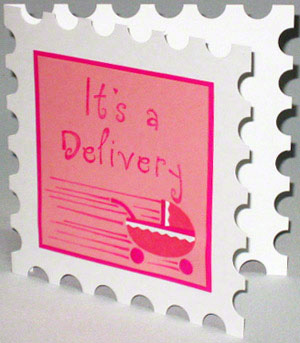
As you can see, this baby greeting card looks like a postage stamp.
Therefore, the humor comes from the fact that a postage stamp is for package delivery. And, a new baby is a precious package that comes from a medical delivery.
By now, you are probably smiling because you already have a funny phrase to put inside the card that will match this theme. Right?
If not, don’t worry. There are a few suggestions below...
Remember to add a funny phrase inside the new baby greeting card
Okay, it's established that this is a funny new baby greeting card. Now, what greeting card message will you write inside to add more humor to the card?
Well, here’s one suggestion in a few different ways:
For baby birth announcement, you can print:
Announcing a baby delivery
...with zero mailing fees
Alternatively, for telling grandparents and other family members:
Special delivery....
Go ahead,
Unwrap the package.
...It’s a girl!
Congratulations!
For baby shower greeting card, you can write:
Congratulations!
It’s a beautiful and precious delivery
...with no mailing fees
Next, lets make the new baby greeting card.
Tools and Materials
5” x 10” white cardstock paper
3.75” x 3.75” pink fairy cardstock paper - darkest pink
3.5” x 3.5” pink blossom cardstock paper - lightest pink
2” x 1.5” pastel red cardstock paper - middle shade pink
0.5” x 3” strip of white cardstock paper
1” x 3” strip of pink fairy cardstock paper - darkest pink
Pink ink pad
Pink colored pencils
Drawing pencil
Eraser
Scissors
Zigzag shape edge decorating scissors
0.25” hole punch
0.5” hole punch
Rubber stamps
Mounting blocks for rubber stamps
Sliding paper trimmer
Metal ruler
Scoring stick
Oval or ellipse template
Cutting mat
Craft cutting knife
Glue
Step by Step Instructions
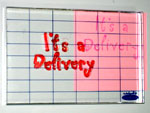
On the 3.5” x 3.5” pink blossom cardstock, use rubber stamps and pink ink pad to print “It’s a” on the first line and “Delivery” on the second line, leaving 1.5” space below the finished print.
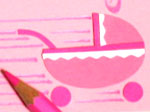
On the 2” x 1.5” pastel red cardstock paper, use the oval template to draw an ellipse of 1” height and 1.5” width. This is the basic shape of the crib.
Use the scissors to cut out this oval shape out of the cardstock.
Mentally dividing the oval into four equal parts, cut out the top left part of this oval as opening for the crib. Hence, the edge of this cut is 0.75” from the left and 0.5” from the top.
On the 1” x 3” strip of pink fairy cardstock, cut out a 1/16” x 3” strip. Save the rest of the 1” x 3” strip. You will use it later below.
Glue this 1/16” x 3” strip horizontally in the middle of the oval crib. This covers the whole 2” oval length, leaving about 1” of the strip dangling at the end.
Cut this dangling pink strip.
Next, glue this cut pink strip vertically on the remaining edge of the crib opening. This leaves about half of the strip dangling at the top.
Cut off this excess dangling pink strip.
For the 0.5” x 3” strip of white cardstock paper, use the zigzag edge decorating scissors to cut a 3/32” x 3” strip
Glue this 3/32” x 3” white zigzag strip horizontally, edge to edge, and directly below the first glued pink strip. Hence the remaining 1" strip is left dangling.
Cut this dangling white strip.
Next, glue this cut white strip vertically, edge to edge, and directly to the right of the first glued pink strip. This leaves about half of the strip dangling at the top.
Cut off this excess dangling white strip.
Glue this finished crib to the bottom right of the 3.5” x 3.5” pink blossom paper just below “Delivery.” This becomes about 0.25” and ⅝” from the right and bottom edges of the paper respectively.
Pick up what’s left of the 1” x 3” strip of pink fairy cardstock paper you saved earlier.
Use pencil and ruler to draw a 0.25” x 0.5” box on this strip.
From this box, cut out the handle for the crib.
On what’s left of this same strip, use the 0.25” hole punch to punch out two circle pieces for the wheels.
Glue the handle of the crib in place on the left edge of the crib opening.
Glue the two wheels of the crib in place below the crib and 1” apart from center to center.
Use pink colored pencil and ruler to draw speed lines that start close to the crib and disappear toward the left of the paper. Hence, these lines are thickest towards the crib.
Score the 5" x 10" white cardstock in the middle and fold it into a 5” x 5” card.
Next, use the pencil and ruler to mark off ⅝” from the left and right of all the corners. These lines, which are 3.75” apart per edge, represent the centers of the first and last holes on each edge.
With the ruler and pencil, draw 4 more lines on each edge that divide this 3.75” gap into five equal spaces of 0.75” each.
Do this for all the four edges.
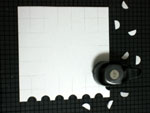
Using these lines and the edge of the paper as circle centers, align the 0.5” hole punch. And punch out a total of six semi circles from each edge.
Clean off the pencil marks from this white part of the new baby greeting card.
Glue the 3.5” x 3.5” finished pink blossom cardstock paper with the crib and speed lines onto the center of the 3.75” x 3.75” pink fairy cardstock paper.
Next, glue this 3.75” x 3.75” pink fairy cardstock paper right in the center of the hole-filled white cardstock paper.
Next, simply deliver the funny new baby greeting card and bring laughter to the baby shower celebration.
Please note
By the way, this pink card is, usually, for a girl. To make one for a boy, simply use different shades of blue cardstock, rubber stamp ink, and colored pencils.
However, this rule is a matter of preference. So, there’s no problem with using these colors or any other colors you like to make the card.
Recent Articles
-
Get Free Greeting Card Templates plus Ideas on How to Make Yours
Download Various Types of Greeting Card Templates and Get Options for Adapting Them. Includes Precautions and Proactive Steps to Help Prevent Messing Up Yours. -
Did You Notice the Revamped Homepage?
Indeed, it’s been a longtime coming, but the homepage makeover is finally here. For comparison, feel free to see the way it used to look as captured through the inescapable Wayback Machine Internet Ar… -
Free Card Greetings for Saying Hello and Goodbye in Your Greeting Card
Get ideas to personalize your greeting card salutations and valedictions because cool card greetings make great first impressions about your greeting card messages.


New! Comments
Have your say about what you just read! Leave us a comment in the box below.